


Many of the core, foundational biomechanical principles discussed in this article were gleaned from Mark Rippetoe’s Starting Strength. Though the book is not about powerlifting per se, it contains over 300 pages of discussion on how to apply classical mechanics to the powerlifts. I highly recommend getting a copy of the book
if you consider yourself a student of the game.
The first article in this series laid out the basic scientific principles that govern Powerlifting technique. Namely, the bar must travel in a vertical line directly over the middle of the foot in order for the lift to be efficient.
In the second installment, specifically focusing on squat mechanics, the wide stance, low bar squat was proposed as the best squat for the sport of powerlifting. The wide stance, low bar squat reduces our range of motion, allows us to be more upright, emphasizes using the larger, stronger posterior chain over the quads, and it also allows us to manipulate our leverages to make the lift easier. If you’re arriving here without having read Part II, I highly suggest that you do so now.
I realize that technique articles are simply not as effective as videos. If you’d prefer a shorter, but more visually oriented explanation of the PowerliftingToWin squat technique, check out this video:
How to get into Low Bar Position
For the high bar squat, all we have to do is place the bar on top of our traps and we’re set to squat. Not so in the low bar squat. The low bar squat is carried just above the rear delts. In order to get into this position most effectively, I’ll recommend what we’ll call the “click” method:
1) Take a grip on the bar
2) Place your body on the front side of the bar and stand all the way up so your rear delts are actually above the bar
3) Pinch your shoulder blades together and slowly start sliding your back down the bar
4) Once the bar “clicks” into place, it will be in the perfect low bar position
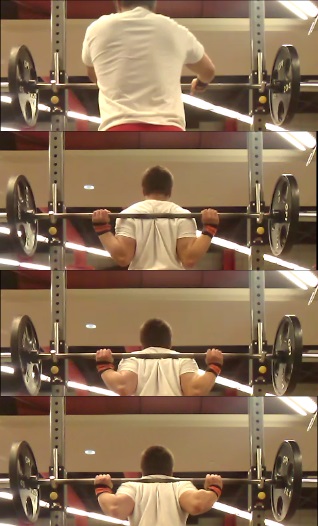
The perfect low bar rack position every time.
Grip Width
Now, I’m sure you’re wondering what is the best place to put your hands in step one? This is an easy question to answer. The narrower you can grip the bar, the better. The narrow your grip, the tighter your upperback muscles will be. The tighter your back muscles, the more secure the bar position will be.

The bar rests on the shelf made by your upperback muscles. Note how much tighter the upperback is with a closer grip.
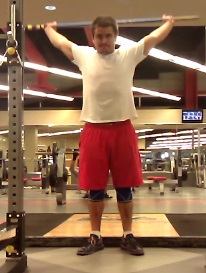
If you struggle to get your hands closer in the squat, the number one mobility exercise that will help is shoulder dislocations:
Now, there are a few caveats here. If your grip is hurting your arms, it is too narrow. Don’t get me wrong, this is not supposed to be comfortable, but joint pain is a bad sign. We don’t want impingement and we don’t want the arms to carry any of the weight.
While I promise to devote an entire article to the proper use of wrist wraps in every lift, this isn’t that article. However, it needs to be said that wrist wraps are absolutely necessary if you plan to use bent wrist grips. Otherwise, the wrist intercepts some of the weight of the bar. This is a great way to get tendonitis. If you don’t have wrist wraps, you can get the same 36″ pair that I use here. If you don’t want to get wrist wraps, you’ll need to widen your grip a bit so that you can keep your wrists straight.
If you’ve been lifting a while, I’m sure you’ve seen that some people take a thumbless grip on squats whereas others use the thumbs-around grip. For bent wrist grips, I recommend a thumbs around grip. This will allow you to physically “squeeze” the bar with your hands. “Squeezing the bar” tends to tighten up the entire body. However, for straight wrist grips, I recommend the thumbless grip. When you wrap your thumbs around the bar with a straight wrist, “squeezing” the bar tends to invite the wrists to bend once you start actually lifting.

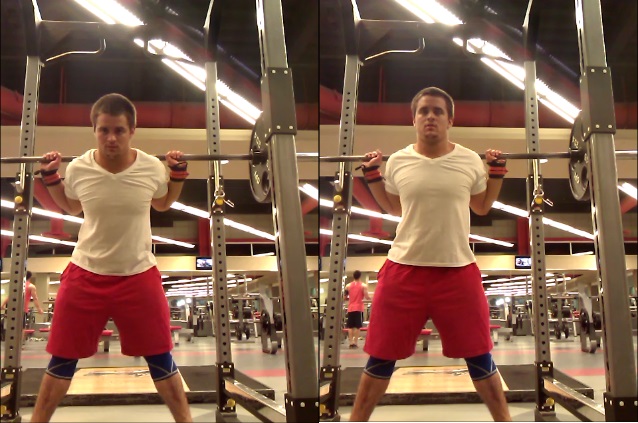
Straight wrist, thumbless grip (left) vs. the bent wrist, thumbs around grip (right).
Stance Width
We haven’t unracked the bar yet, but we’re going to skip ahead to stance width. If you don’t know where to put your feet BEFORE you unrack the bar, you’re in trouble. It is much harder to re-position yourself with a heavy weight on your back than it is to just get to the right spot in the first place.
Stance width is primarily determined by your ability to reach depth without hip pain. Something that many people don’t stop to consider is that there are different anthropometrical possibilities for how the femur and the hip socket actually interact. In other words, not everyone’s bones look alike.
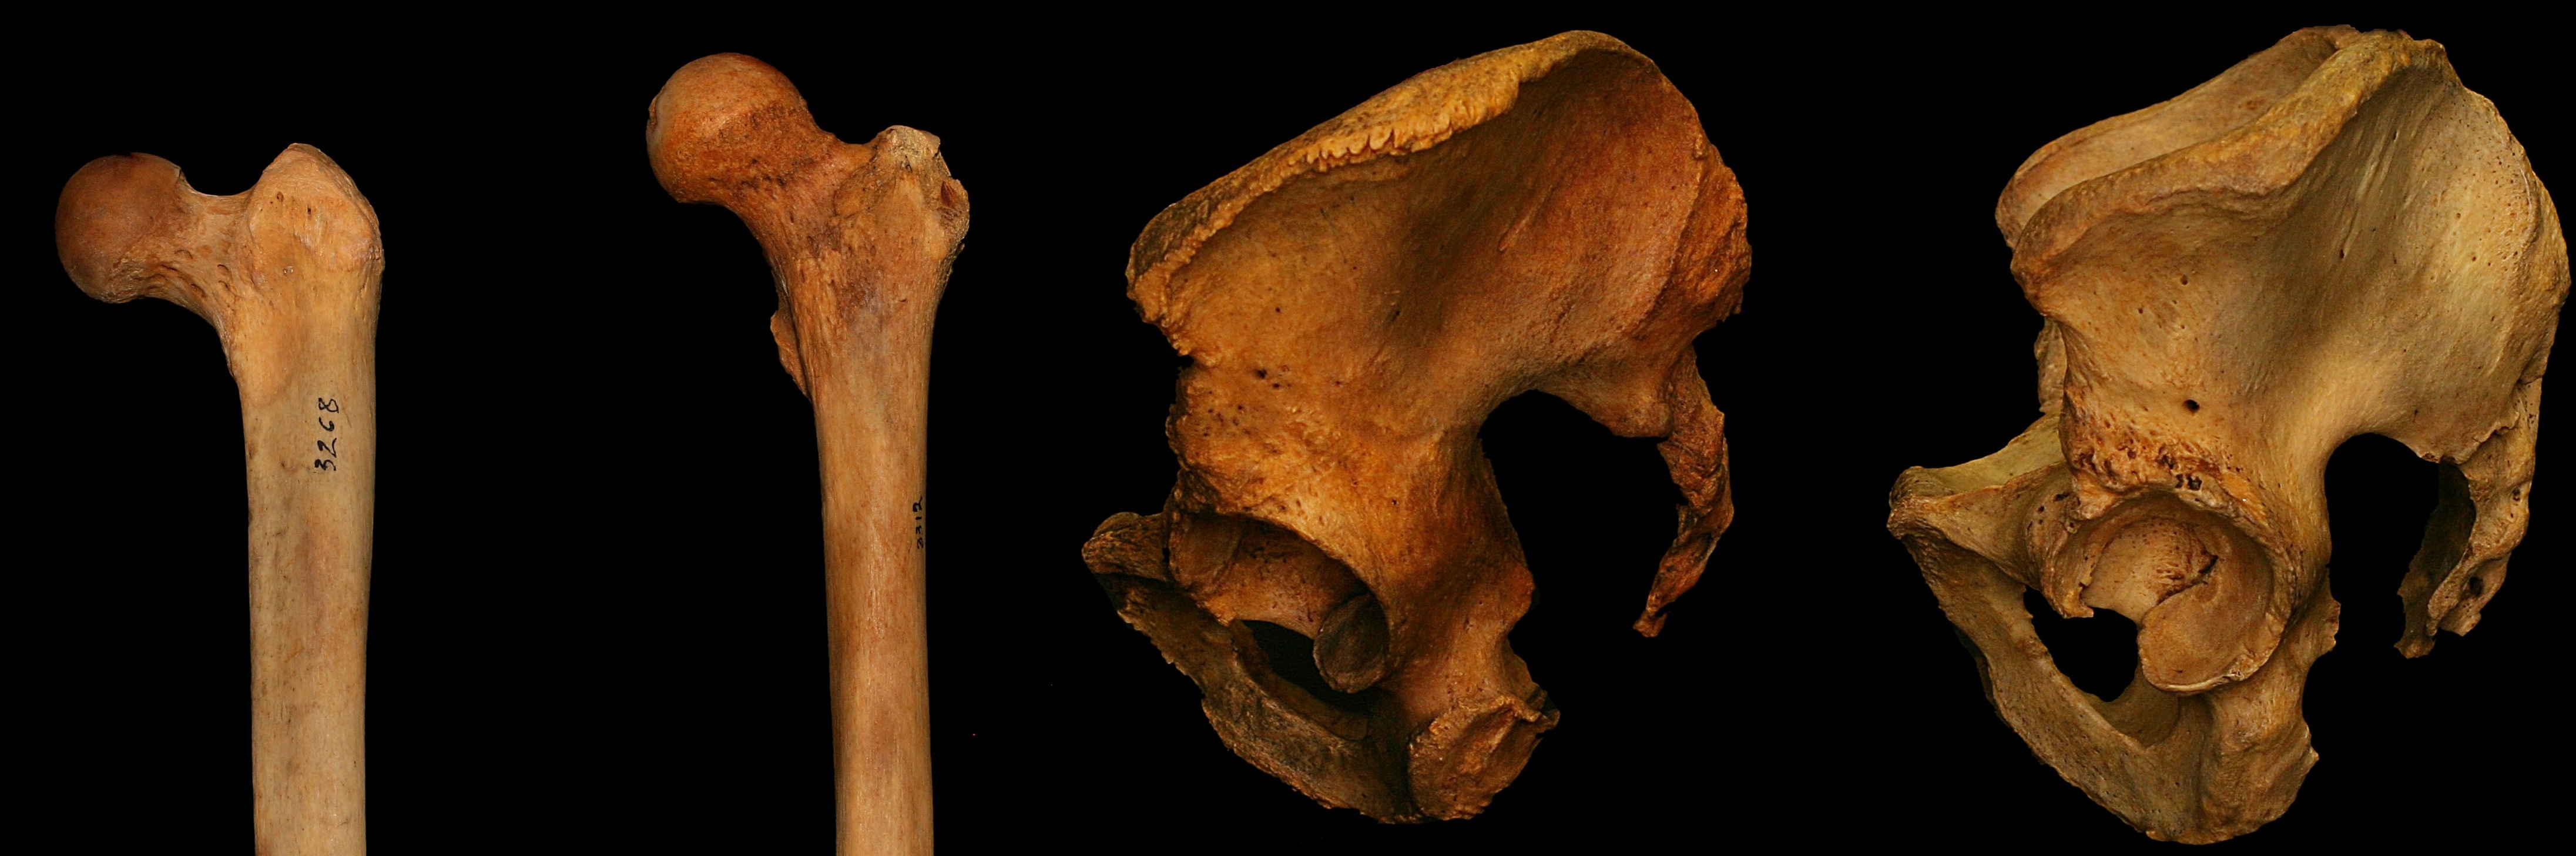
A pair of femurs and hips.
Notice how one femur attaches straight in and the other clearly attaches at at angle. Likewise, one hip socket points straight out whereas the other points down and to the front. These angles have implications on squat technique. You can’t change your anatomy. You must work with it.
Recently there has been a huge trend to work on “mobility” in the Powerlifting community. For the most part, this is good. However, some people fail to realize that not all movement pattern problems come down to mobility. There are people out there who simply cannot squat with certain stances due to the way they are built. You might be one such person. If your hips impinge at wide stances, you’ll have to narrow your stance until it stops. It is that simple. You can work on mobility all day long, but if you don’t have the right structure to squat wider, being more flexible won’t help. If this is something you’re particularly interested in, check out this article.
For those of you who struggle with hip pain, my recommendation is that you squat as wide as your circumstances will allow. After you finish your next squat training session, just dedicate some time to figuring this out. Bring a camera and film yourself squatting at a variety of stance widths. Pinpoint the set that allowed the widest stance without pain and start using that stance going forward.
For the rest of you, the process of determining stance width will be very similar. You’re going to film a bunch of training sets directly from side (where a judge would normally be looking to determine your squat depth). Start at your normal stance and slowly work your way outwards 1-2” at a time. When you reach a stance width that no longer allows you to hit depth, go back a few inches and there you have it: your new wide stance squat.
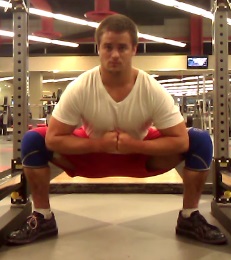
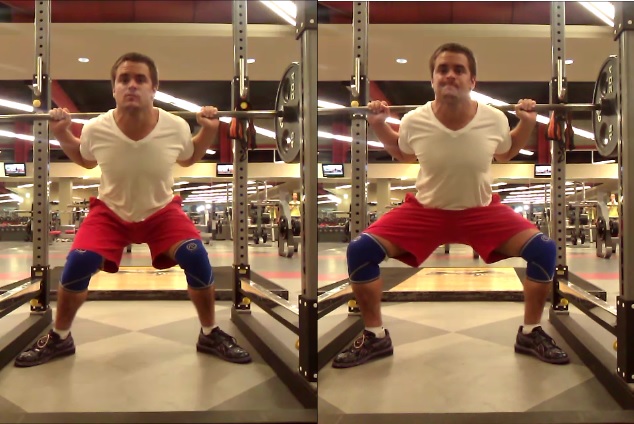
In order: narrow, medium, and wide stance squat comparisons:
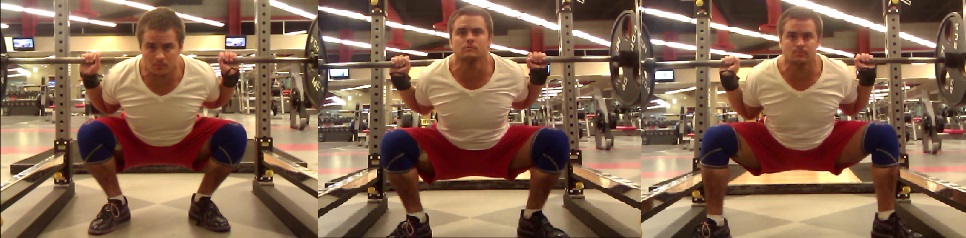
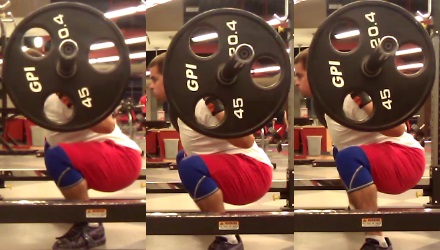
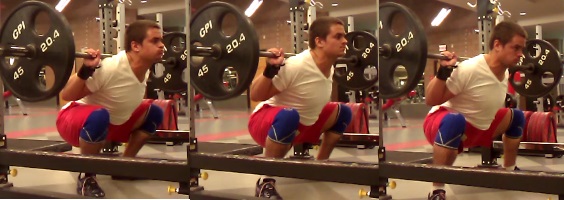
You can see that, for me, the truly wide stance squat is just a bit too wide to hit depth. However, when over 315lbs are on the bar, I can do it. I typically only use that stance for wrapped squats done out of a monolift. For knee sleeve only squats, I typically use the middle stance. Take these same pictures of yourself and see what works best for your body.
A quick note, for those of you in the IPF, make sure that your stance width allows you to go at least 2-3” below parallel. In that federation, just cracking parallel isn’t usually enough; it has to be convincing. Another thing to keep in mind is that this exercise cannot be done without weight. The weight will actually push you down and allow you to get deeper.
Our primary goal here is to ensure that our natural squat “bottom” is just below parallel. The number one way to add weight to your squat is to squat higher. Squatting higher both reduces range of motion and improves leverage. However, we have to follow the rules, too. This exercise is designed to help you find the technique that allows you to hit the bare minimum depth without thinking about it.
Foot Angle
Before you go about trying to determine your stance width, realize that foot angle plays a major role in this discussion. In a proper squat, the knees must track in line with the foot. If they don’t, you place the ligaments in an unsafe position.
Beyond that, let’s remember why the wider stance works: it facilitates more femur rotation. If you’re just standing wider, but your legs are rotated in, you’re not actually reducing the moment arms. We need to decrease the horizontal distance between the hip and the knee and this can’t be done when the femurs are not externally rotated. Here’s the short version: keep your knees out!
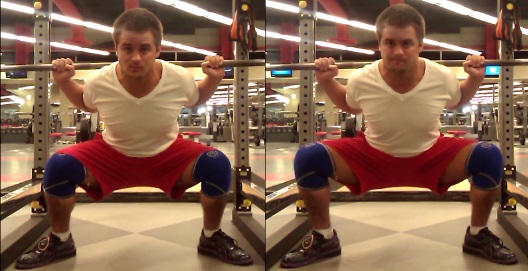
Left: Incorrect; Right: Correct. Keep your knees out.
The wider you stand, the more you’re going to have to point your feet out. For people with fairly wide stances, this may be as much as 45 degrees. For medium stances, you’re usually looking at 30 degrees. And, finally, for narrow stances, you may only point your toes out 15 degrees.
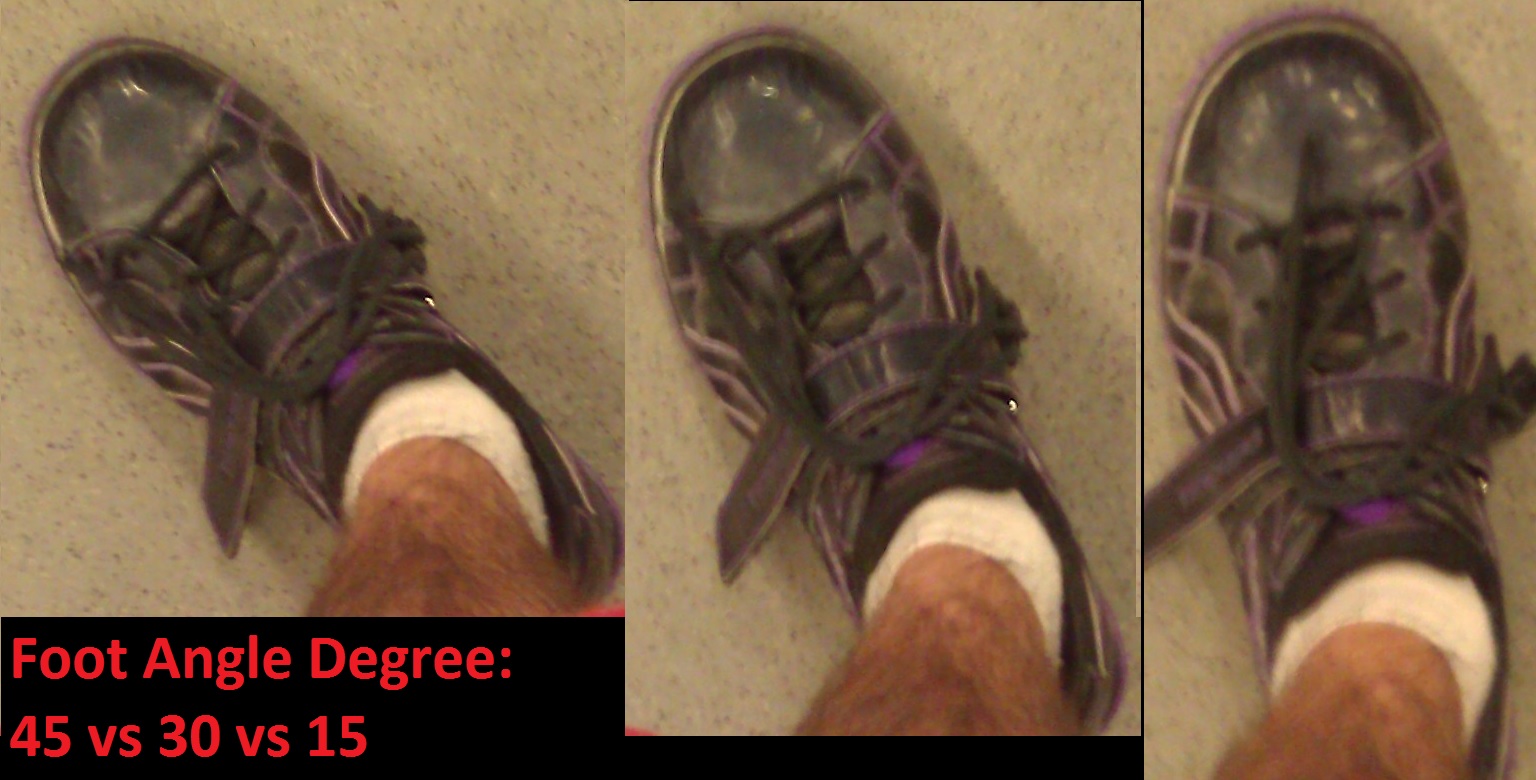
Take whichever foot angle best facilitates getting your knees out.
Don’t get caught up in the numbers. The only thing that matter is whether you or not you can keep your knees out, tracking in line with your toes. If you can’t, try turning your foot more. If that doesn’t work, the stance is too wide for your currently mobility. You’ll need to narrow your stance and/or work on adductor flexibility (muscle on the inside of your thigh).
This is my favorite stretch to improve adductor flexibility.
The Squat Walk Out
Now that we’ve got the bar position and stance handled, we actually have to unrack the bar and set-up to do the lift. When it comes to the walk out the only thing that really matters is that you do it as efficiently as possible. Don’t waste energy. You literally want to use as few steps as possible.
How many steps you need depends on your stance width:
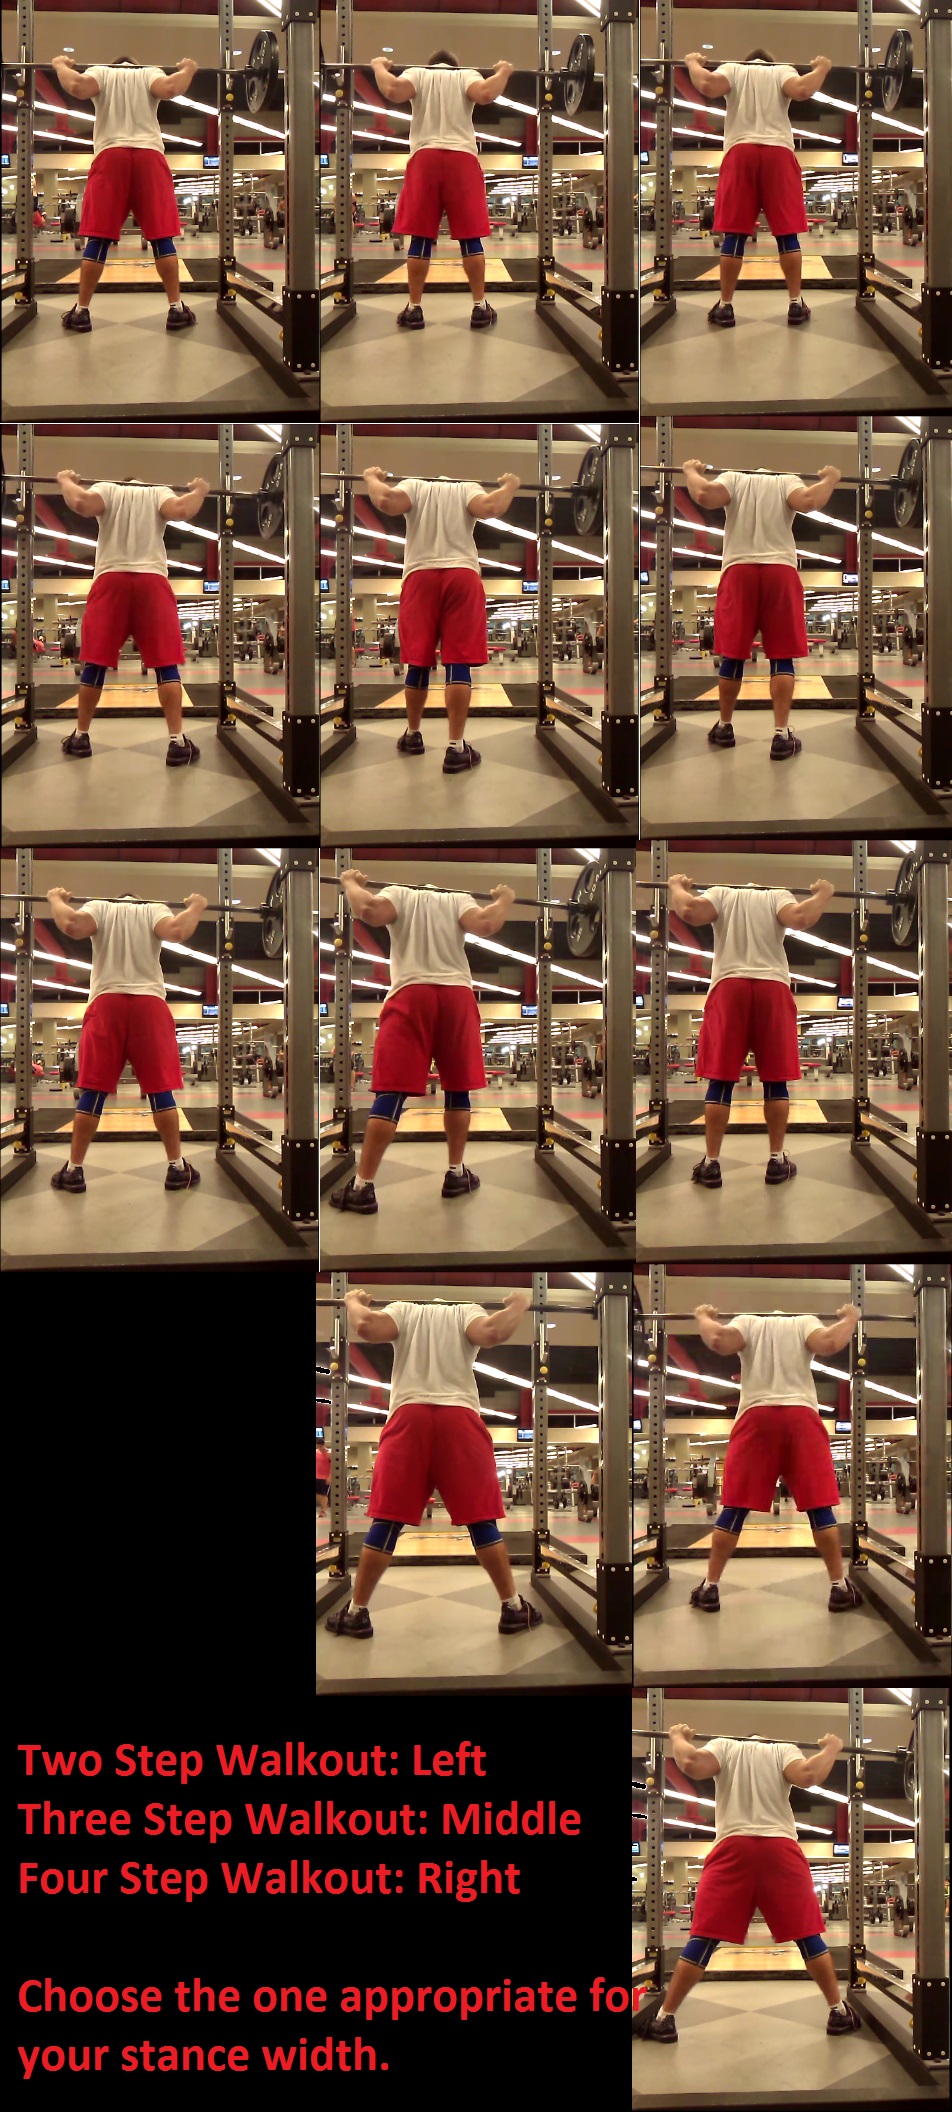
So many people overlook the walk out for whatever reason. If you have a sloppy walk out, it WILL cost you pounds at the meet. Sure, you can walk out 75% without paying much attention but that is because it is 75%. When you are handling 90%+ of your one rep max at a meet, any extra steps that you have to take are going to tax your stabilizers and waste energy. This directly translates to less weight being lifted. Why do you think a monolift adds weight to people’s squats? It saves energy. You can simulate the same effect by having an efficient walk out. Even when you’re just taking the empty bar out of the rack you should be practicing and perfecting your walk out.
Preparing to Squat
After you’ve walked the weight out, it is time to get fully “set”.
The single most repeated coaching cue in powerlifting is “get tight”. If you know it what means, this is one of the best cues there is, period. If you don’t, you strain real hard, make some funny faces, and nothing really happens.
First, overall “tightness” mostly comes down to how you breathe. The most important thing you can do before you attempt a heavy lift is take a huge breath and HOLD IT IN. Holding in your air pressurizes your “core” which stabilizes the spinal column.
The more conformable the kinetic chain is, the less efficient the force transfer will be. For example, imagine trying to tow something around using a spring. Before you could move whatever it is you were trying to move, the spring would have to completely stretch out and “get tight” before any of your tugging and towing could amount to a damn thing.
Well, the same thing happens when you’re trying to squat and you have slack in your abs, back, or anywhere else. We want ALL of that slack GONE before we try to squat. Otherwise, we lose some of our very valuable effort (force production) because it goes into straightening and tightening all of the elements that we didn’t address before we started the movement.
The following is my personal procedure for squat “tightness”:
1) Make sure my feet are set where I want them
2) Set my whole back into extension by shoving my chest up
3) Tighten up my lats by pulling down on the bar with my hands
4) Take as big of a breath as I can and hold it in
5) Set my head position
6) Squat!

Squat Technique: Descent Speed
Ready to squat?
If you’ve followed the model above, there isn’t a whole lot left to discuss. The vast majority of your success in the lift is determined before you ever begin your descent. However, there are two technical issues that I want to address in more depth: descent speed and hip drive.
One of the most common concerns people have over the actual execution of the squat is how fast they should perform the movement. The answer is relatively simple: you should descend as fast as you can without losing ANY tightness. Now, some people interpret this to mean that they should just divebomb as fast as possible into the hole. You cannot “drop” into the squat while remaining tight. You MUST loosen something up to do this.
The faster you descend, the harder you will rebound out of the bottom of the squat. This is due to something called the “stretch reflex”. Whenever any movement is preceded by a loaded eccentric contraction (weight pushing you down), the muscles will stretch out past their normal capacity and, once the concentric movement begins (going back up), the muscles will reflexively contract harder because of the preceding stretch. Think of a vertical jump. Can you jump higher with a sharp dip or can you jump higher by bending, waiting, and then jumping? The reason you jump higher with the sharp dip is due to the stretch reflex of the relevant muscles.
We want to take advantage of the stretch reflex effect, but we don’t want to loosen up to move faster. Remember, any “slack” in the system must be removed before efficient force transfer can occur. By divebombing, you’re setting yourself up for a very nasty whip once the rebound stops and all of that slack has to be removed.
Bottom line? Descend as quickly as you can while maintaining maximum tightness. This takes practice. So practice it.
Squat Technique: Hip Drive
Let me quickly remind you why we picked the low bar squat: to emphasize posterior chain usage. Many people have been taught a version of the squat where the lifter leads with their chest. This throws both the hips and knees forwards. The net effect is that the lever arm at the knees is increased and the lever arm at hips is decreased. This defeats the whole purpose of picking the low bar position.
Instead of driving up out of the bottom by leading with your chest, you need to drive with your hips. This does not mean that you push your hips up while letting your chest fall. Your back angle should be maintained the entire time. That is the point, actually. Leading with your chest alters your back angle leading to a more upright posture. Instead, We lead with our hips to preserve our posterior chain dominant squat style and maintain the back angle we’ve so carefully chosen.
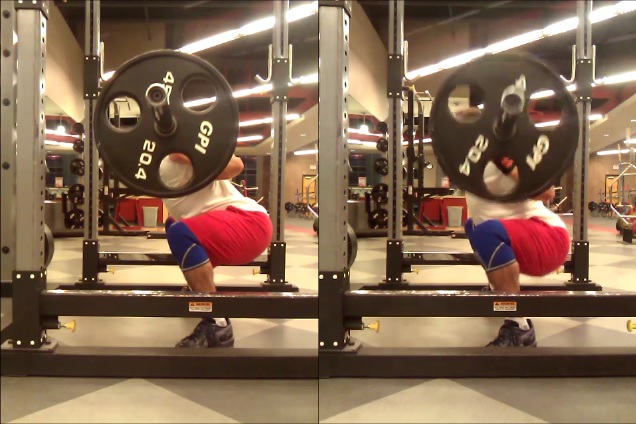
In the pictures below, the top image demonstrates the incorrect way to begin your ascent. The bottom image shows the correct way. Lead with your hips, not with your chest:
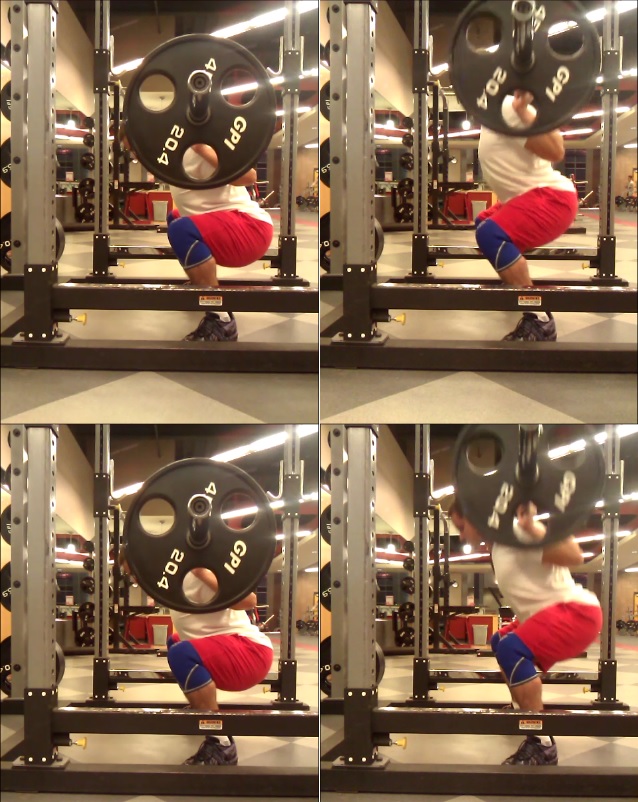
Notice how leading with the chest really throws the knees forward.
Common Squat Form Errors
Nearly all of the most common errors in squatting result because the lifter has failed to follow the guidelines we’ve already talked about. In each of the following pictures, the error is depicted on the left with the corresponding correction shown on the right.
Mistake #1: Rounded Back
Coaching Cue Fix: Chest up!
Mistake #2: Getting Forward of mid-foot at the bottom of the squat
Coaching Cue Fix: Chest up!
Fix, Coaching Cue: Chest up!
Mistake #3: Knees In
Coaching Cue Fix: Knees Out!
Fix, Coaching Cue: Knees Out!
Mistake #4: Leading with the chest
Coaching Cue Fix: Hip Drive!
Mistake #5: Timid descent speed
If you have a tendency to get nervous and approach the descent too slowly, you’re going to squat less. Not only is this going to diminish the stretch reflex, but it shows your head isn’t in the right place. Get your mind right and hit the hole with aggression.
Fix, Coaching Cue: Fast Down, Fast Up!
Moving Forward
Well, there you have it: The Powerlifting To Win Squat Technique. If you haven’t watched the technique video yet, I highly recommend you do so if you’re a visual learner:
If you found this content interesting, intriguing, hell, even fascinating, I know you’ll love Mark Rippetoe’s Starting Strength. Starting Strength is the only book I am aware of that analyzes lifting from a framework of biomechanics and classical physics. If you haven’t read it yet, you should.
In Part IV, we’ll be discussing the mechanics of bench press technique.
Like this Article? Subscribe to our Newsletter!
If you liked this articled, and you want instant updates whenever we put out new content, including exclusive subscriber articles and videos, sign up to our Newsletter!
Questions? Comments?
Table of Contents
Part I: The Scientific Principles of Powerlifting Technique
Part II: Squat Form Analysis
Part III: How to Squat Like A Powerlifter
Part IV: Bench Form Analysis
Part V: How to Bench Press Like A Powerlifter
Part VI: Deadlift Setup Science
Part VII: Deadlift Form Analysis
Part VIII: How to Deadlift Like a Powerlifter
There is one thing that I think helps in the Pre-Squat setup.
When you take the breath in I agree is right but you need to PUSH the air into the diaphragm not keep it in the upper lungs but in to the belly area and this help keep the core much more tighter. In addition if you ae wearing a belt it pushes the belt forward and causes it to pull the back tighter too.
I agree. The air should definitely be taken into the abdominal area. My thoughts on the subject are that you should be getting your core as tight as possible. This means maximum contraction with air in the stomach (not necessarily pushing against the belt intentionally, but if you’re doing it right this will happen).
Wow! I haven’t been on the site in a few days, and all the new content is GREAT! I’m passing this along to some lifters who will love it.
Awesome! Thank you!
Wow, this really helps. Thanks a lot, and I’ll be sure to come back. 🙂
Glad to hear it!