


If you weren’t aware by now, a lot of the concepts in this Powerlifting Technique series were distilled directly from Mark Rippetoe’s Starting Strength. While I’ll do my best to convey these complex topics in stream-lined article form, if you find yourself wanting more, note that Starting Strength contains 300+ pages of this type of discussion. It isn’t just a book about a novice program. You can grab a copy here.
In my opinion, the bench press is by far the most technically challenging movement of the three powerlifts. Because of this, the bench press is also the powerlift where you will see the greatest technical variety. And because of this, many would suggest that it simply isn’t possible to prescribe an optimal model for powerlifting that can be applied across populations.
Minor tweaks and extenuating circumstances notwithstanding, I disagree. If you’ve read Part IV of the technique series regarding bench press mechanics, you probably do as well. For reasons put forth there, the wide-grip, arched-back bench press will be considered the optimal, and preferred, technique for the purposes of powerlifting for the remainder of this article. In other words, this “powerlifting style bench” will be our base model going forward.
If you prefer to watch rather than read:
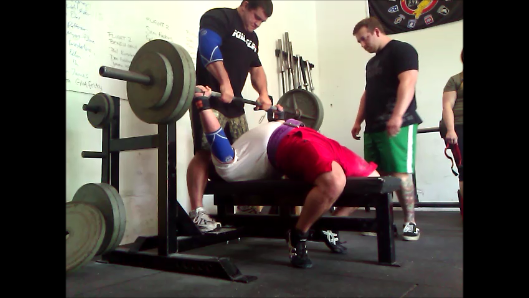
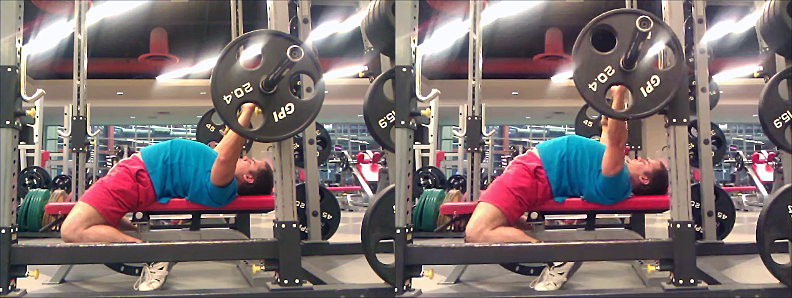
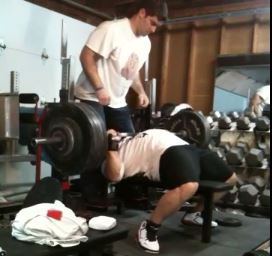
My full bench set-up.
Bench Press Set-Up
Excuse my simplicity here, but all of the powerlifts can be divided into two distinct phases: set-up and execution. In all three lifts, the execution phase is simple compared to the set-up. Both phases will be covered in this article, but we shall begin with the more challenging set-up phase.
A powerlifter interfaces with the equipment apparatus at five important points:
1) Hands with the bar
2) Head with the bench
3) Shoulders with the bench
4) Butt with the bench
5) Feet with the ground
Each of these five distinct contact points present critical technical issues worthy of analysis and careful thought. No single aspect can be glossed over and they all deserve adequate attention.
Let’s begin in order.
Bench Press Grip
While Part IV has already established that as wide of a grip as possible should be used, I will briefly note that some part of the forefinger must be in contact with the “power rings” which are spaced 81cm apart on a properly marked bar. If you need a refresher on the technical rules of the bench press in powerlifting competition, please refer to this article.
Bar Placement
However, where the bar is positioned in the hand is also of critical importance. Far too many novice lifters place the bar towards the top of the palm near the fingers. This creates an unnecessary moment arm between the wrist and the bar.
As we’ve learned in the foundational article of this series, the creation, or elongation, of moment arms increases the leverage we must overcome to complete the lift. This will directly translate to a decrease in efficiency and thus less weight will be lifted.
In order to minimize any moment force on the wrist joint, the bar must be placed as close to the heel of the palm as possible. In fact, proper grip technique entails first placing the bar at the end of the hand and only then wrapping the fingers around the bar. Most lifters reverse this order and it creates a small moment arm between the wrist and the bar.
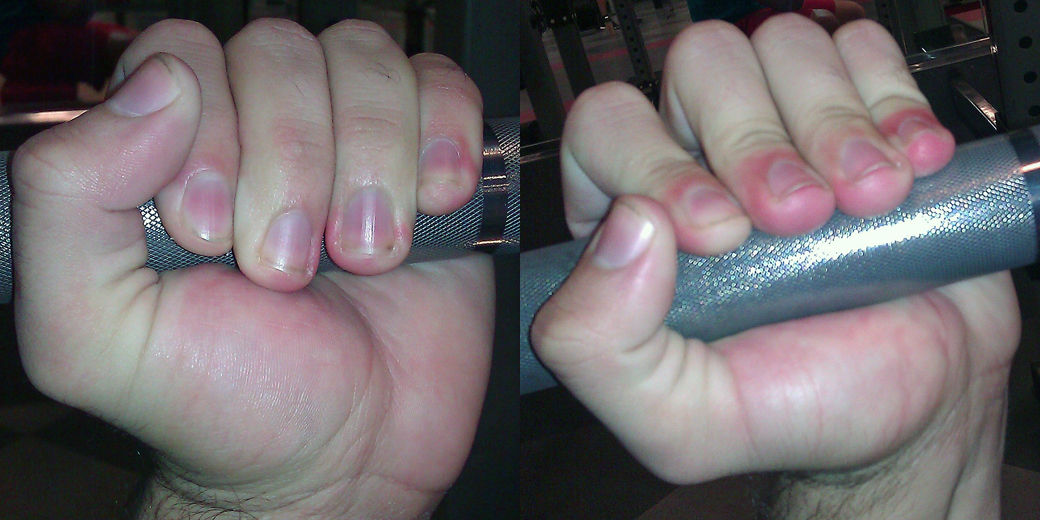
Most people carry the bar too far back in the hand (left). Carry the bar as close to the heel of the palm as possible (right).
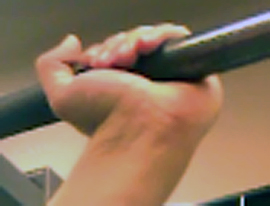
Thumbless Grip
Many lifters employ a “suicide” grip. Why are they doing this? Well, often times, this grip allows them to get the bar closer to the wrist joint. If the bar rests in the back of the hand, switching to a suicide grip will indeed increase efficiency. However, this increased efficiency comes at a cost. Maximal muscle recruitment is decreased when the hands cannot fully “squeeze” what the arms are pushing.
If you doubt this, take your one rep max on a standard barbell and compare it to a max taken on a fat bar. The results should be enlightening.
The long and short of it is that, so long as you put the bar at the heel of your palm anyway, the suicide grip provides no competitive advantage. Not only is a thumbs-around grip safer, it is more effective as well. You should literally try to “leave your fingerprints on the bar”; squeeze it as hard as possible.
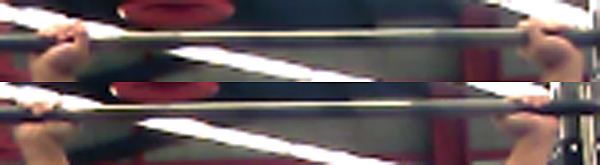
Notice how the thumbless grip (bottom) is actually further away from the wrist joint than the properly utilized thumbs-around grip (top).
Reverse-Grip
Every so often you’ll see the rare lifter who prefers to use a reverse-grip bench. The reverse-grip should not be used by anyone who has the ability not to use it. Put another way, the reverse-grip is really only useful for those whose shoulder health does not permit a prone grip.
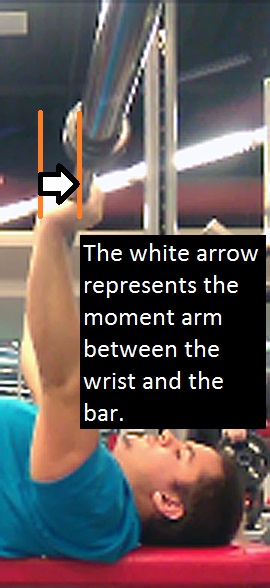
The reason for this is that, in order to maintain a position where the elbows are under the bar, the reverse-grip necessitates a much longer moment arm between the bar and the shoulder.
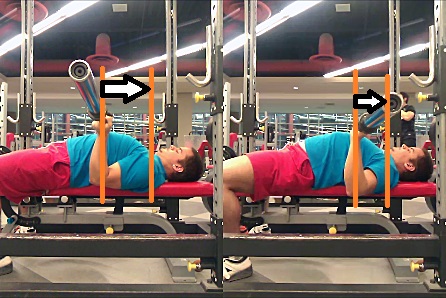
The reverse-grip bench (left) creates a much longer moment arm between the bar and the shoulder (represented by the white arrow).
Wrist Wraps
It is my personal opinion that for all but the tallest and widest lifters, the wide grip bench press should not be performed without the use of wrist wraps. In lifters with smaller frames, wider grips tend to produce radial deviation of the wrist joint.
Note the unnatural angle that the hand and wrist sit at due to the grip width. This is called radial deviation. It isn’t safe. Wide grip benching necessitates wrist wraps.
Without wraps to help absorb these forces, the wrists very may well be damaged. If you do not own a pair of wrist wraps, you’ll need to narrow your grip. Alternatively, you can purchase a pair from AndersonPowerlifting.com.
Head Position
It is important to note that many federations require the head to remain flat on the bench throughout the movement. Check out our reference table on the various powerlifting federations to see if your federation allows the head to be lifted.
Unfortunately, there is no clear cut answer on what to do with your head during the bench press. However, I do think it is relatively clear that particular styles benefit more from the raised head than others. Let’s start there.
For those of you with a “low” touch point (further away from the shoulder), raising the head can be advantageous. Most shirted benchers raise their head because it raises the stomach/upper ab area thus making it easier to touch. Well, the same logic can be applied if you prefer to touch low in order to have the shortest range of motion possible. Lifting your head will further cut that range of motion.
However, if you tend to bench in more of a straight line, with a touch point closer to the shoulders, I’d strongly recommend against lifting the head. Lifting the head tends to depress the chest because lifting the head tends to cause a bit of thoracic rounding. Additionally, the head helps anchor the shoulders in place by preventing you from sliding. Not only that, the muscles of the neck can actually contribute to the movement itself if you dig them into the bench during the press. This is one reason people talk about “pushing the bench away from you” rather than pushing the bar away from you. Such cues improve overall tightness, muscular recruitment, and thus force transfer and the amount of weight you lift.
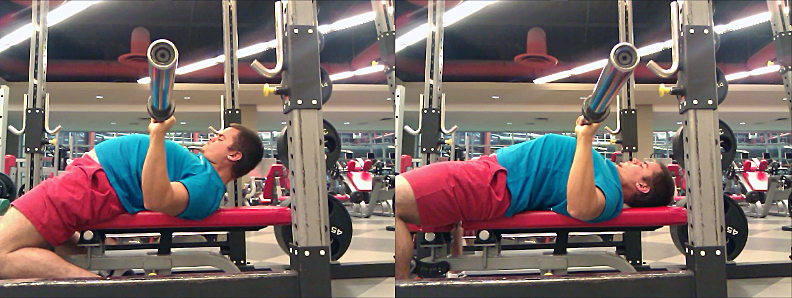
Head up, low touch bench press (left) vs. high chest, straight line bench (right).
Scapular Retraction
The ability to set a high, tight arch is probably the single most important technical aspect of the competitive powerlifting style bench press. The remaining positions of the as-of-yet undiscussed contact points, the shoulders, butt, and feet, are completely dependent on the arching method selected.
Shoulders
There is one exception. For all forms of benching, the shoulders should be held in a position of maximal scapular retraction.
Retracting the scapulas does two important things for us. First, it increases the stability of your shoulders on the bench by tightening the upperback. Second, the active retraction will pull the shoulders themselves further back into the joint socket which will decrease your overall range of motion. The scapulas must be held in retraction during the entire movement.

Full scapular retraction (left); zero scapular retraction (right).
Foot Position
As with head position, some federations mandate a flat foot. To see if yours does, check out the visual guide to powerlifting federations.
There are two common positional questions regarding the feet in the bench press:
1) Should the entire foot be flat or should you lift on your toes?
2) Should the feet be tucked back beneath the lifter or more out in front of him?
Much like head position, the answer depends primarily on your bench press stroke.
Tucking your feet behind you tends to produce the largest overall arch because it allows for greater hyperextension of the lower parts of the spine (both thoracic and lumbar). This is due to the fact that tucking your feet behind you allows you to put the nearly entire lower body, even the hips, into a position of hyperextension. If the whole chain is hyperextended, you get a better arch. However, with this style of arching, the highest contact point tends to be the top of the abs or the bottom of the sternum. For those of you who prefer lower points, this is obviously ideal.
Having your feet out in front doesn’t tend to allow for the same level of arching, but it does allow for a more solid interface with the ground. This both improves leg drive and the ability to drive one’s weight onto their traps. With more of the weight on your traps, you tend to get a higher “chest” position closer to the shoulder even though the overall height of the arch is less. For those of you with straight line benches, this is preferable.
Note the different angle of the arch with the feet behind (left) versus when they are in front (right).
How to Arch on the Bench Press
While there are a thousand subtle variations of how to set-up an arch, I’m going show you two of the best methods: the slide through and feet on the bench.
The Slide Through
1) Start with your feet as close to the head of the bench as possible (on toes)
2) Sit-up on the front side of the bar (body on the wrong side of the bar)
3) Push your toes into the ground and use the bar against the pins to slide into an arch
4) Without moving your feet, push the uprights to set the arch deeper
5) Fight your heels flat (optional, depending on federation)

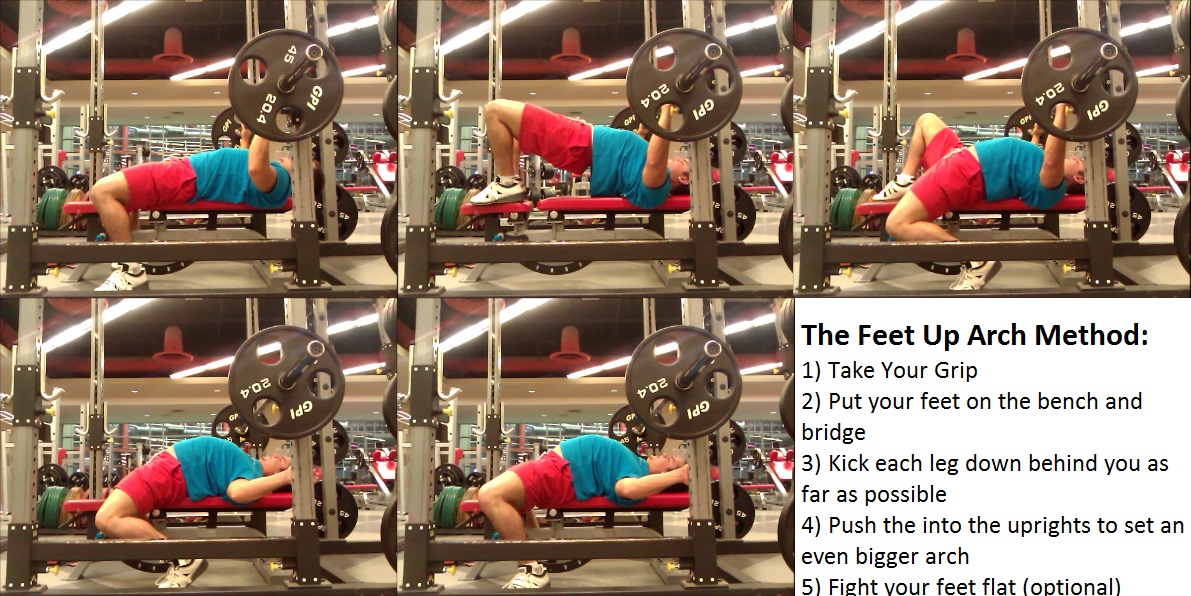
Feet on Bench
1) Place your head on the bench exactly where you want it to be in the final position
2) Pick your feet up off of the ground and put your heels on the bench
3) Walk your feet as close to your shoulders as possible while pushing up into an arch
4) Kick your feet back off of the bench one at a time
5) Fight your heels flat (optional, depending on federation)
Bench Press Leg Drive
Leg drive is a concept that falls somewhere between set-up and execution. Realistically, leg drive is involved in both phases. If you’re unfamiliar with the concept, leg drive, as it pertains to the bench press, is literally the active engagement of the lowerbody by pushing the ground with your feet. You “drive” your legs into the ground, hard.
Leg drive can be used in one of two ways. The first method simply helps to take the slack of the system. If you push the ground with your feet, you extend the kinetic chain to the ground. The force transferred from your legs tightens up your entire body and translates to a bigger arch and a higher chest position. As we’ve heard a thousand times already, a tighter set-up means more weight lifted.
Leg drive should begin during the set-up and it should be maintained throughout the entire lift. Just as you don’t let your air out during a big lift, you don’t stop with your leg drive either. Get tight.
The second method of using leg drive involves purposely leaving some slack in the lower body. With this method, the lifter waits until he is given the press command before he initiates his full leg drive. This creates a “jolt” effect that gets the bar started. I do not recommend this technique because it relies upon first being loose and then getting tight afterwards. I’m a proponent of staying tight throughout the lift. We’ll talk more about this when we get to whether or not you should sink the bar into your chest in the execution phase.
Zero leg drive (left); Using leg drive (right). Notice the position of the heels in both pictures. On the right, the heels are being driven down as the lifter engages leg drive. Look how much tighter the set-up is.
Lat Engagement in the Bench Press
Lately there has been a great deal of controversy over whether or not the lats actively contribute to moving the bar at the bottom of the bench press. That is an article for another time, though. What is important is that the lats, like leg drive, need to be activated and engaged at the end of your set-up and throughout your lift.

The “lats”.
Tightening the lats is critical for two very important reasons. For one, contracting the lats improves overall tightness. Overall tightness improves our lifting. Two, when you contract the lats, the muscle belly shortens – both ends of the muscle are pulled closer together. This “shortens” the effective length of your upper back and drives your chest upward. The lats, in the context we’re discussing here, drive your chest up.
If you can’t flex your lats simply by thinking about it, the best cue I’ve learned to engage them is “break the bar”.
Not breaking the bar (left); Breaking the bar (right).
When you “break the bar”, you internally rotate your shoulders and this motion tends to lock down the lats. Making sure that you set your lats before the hand-off ensures that your chest is as high as possible and that your tightness is maximized.
Notice how when the lats are contracted (right), it pulls the shoulders closer to the butt thus raising the chest? Tighten your lats.
Bench Press Execution
Virtually every important technical aspect of bench press execution has to do with either where you touch your chest or how you touch your chest. Because we’ve already extensively dealt with where to touch, at least peripherally, this section will focus on how you touch your chest.
Breathing
But first, we need to talk about breathing. The bench press, like all of the other powerlifts, should be done on a single breath. When you breath out, air escapes the lungs and this collapses the height of your chest. Additionally, holding your breath increases intra-abdominal pressure which improves stability and thus force transfer. Again, this is the importance of the magic “get tight cue”. The less slack the system has, the less force will be lost tightening that slack and this directly translates to more weight being lifted.
”Tucking”
One of the most frequently given cues in the bench press has to do with “tucking” the elbows. This is an obnoxious cue and, depending on what is being taught, generally a bad one.
“Overtucking” occurs when a lifter attempts to keep his elbows so close to his body that they actually end up pulling the elbow out of line with the wrist entirely. This is poor form. When the elbow is pulled out of line with the wrist, an unnecessary lever arm is created between the bar and the elbow.
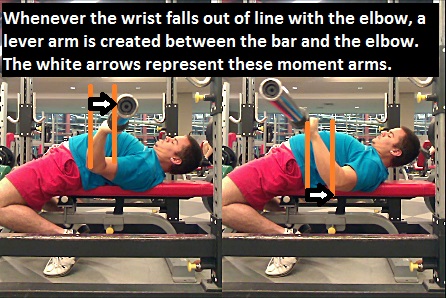
Overtucking the elbows brings them out of line with the bar and makes the lift harder.
If you just focus on touching where you’re supposed to touch given your technical style, the necessary amount of “tuck” handles itself. This is due to the fact that the body doesn’t generally voluntarily create unnecessary moment arms. It is harder to bench with the wrist out of line with the elbows and the lifter will perceive this fact. They’ll naturally avoid overtucking.
The “tuck” cue comes from shirted benchers who touch very, very low on their chest. This cue makes some sense for them. The shirt is going to fight that low touch position. Focusing on “tucking” improves their chances of touching where they want to. Raw lifters don’t deal with these forces and, generally speaking, they don’t need to be cued to “tuck” — at all.
Sinking vs. Holding
Sinking the bar into your chest is not technically against the rules. As long as you don’t sink it further after the press command, there is nothing in the rulebook that says you can’t do this. Dan Green tends to bench this way.
However, I am not a fan of this style of benching. Generally, when lifters sink, they relax the entire chain and, then, when given the press command they try to quickly JOLT the system tight again. This produces a pop effect right off of the chest. However, it also frequently puts the lifter out of position or throws them out of their groove because they had to loosen up in order to then produce that tightening jolt. This decreases reliability and repeatability in the movement pattern.
Lifters who employ the sink and jolt technique usually do so to compensate for a weak RoM right off the chest. The jolt messes up the rest of the range of motion but as long as they can beat their sticking point, it is worth it for them.
Personally, I’d rather see lifters flatten out their force curve through their training rather than their technique. In this manner, they can keep the more efficient, “tighter” bench set up while still getting past those sticking points. Through the course of a lifter’s development, his sticking points will change. The sink and jolt technique only works best for those who are weak at the bottom. If they work hard to fix that issue through smart exercise selection and effective programming, the sink and jolt then becomes a technical weakness they must completely overhaul.
I’d rather stick with the technique that can be mastered over many years rather than use a compensatory technique. That’s just me. It might be worth it for you to try both methods. That said, my personal opinion is that the “hold” style of pausing is more efficient.
Dan Green sinks his bench presses.
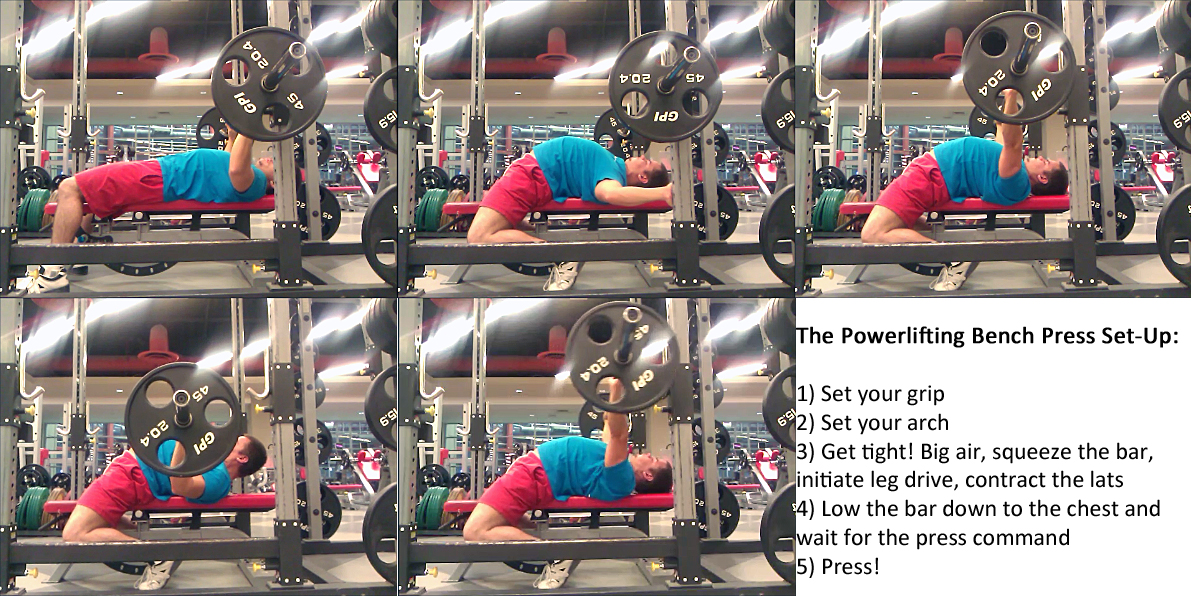
Bringing It All Together
We’ve now covered some of the most relevant and important aspects of the most technically challenging powerlift: the bench press. Now, I want to walk-through a competition bench press rep, step-by-step to make sure that the entire process is crystalized in your mind.
Step 1: Set your grip width
Step 2: Set your arch
Step 3: Get tight: bend and squeeze the bar, take big air
Step 4: Take your hand off, lower the bar down and pause
Step 5: PRESS!
Moving Forward
I know that was a massive amount of information to digest. Technique articles often don’t work as well as technique videos. If you prefer live demonstrations of many of the things discussed above, check out this video:
Guys, I can’t say it enough. If you’ve enjoyed this type of biomechanical analysis of the lifts, you will love Mark Rippetoe’s Starting Strength. The topics covered here are extended to over 300 pages in that text.
In Part VI of this series on powerlifting technique, we’ll analyze the biomechanics behind the deadlift. My opinions on the subject are definitely a bit controversial, but, as usual, they’ll be 100% backed by mechanical analysis.
Like this Article? Subscribe to our Newsletter!
If you liked this articled, and you want instant updates whenever we put out new content, including exclusive subscriber articles and videos, sign up to our Newsletter!
Questions? Comments?
For all business and personal coaching services related inqueries, please contact me:
Table of Contents
Part I: The Scientific Principles of Powerlifting Technique
Part II: Squat Form Analysis
Part III: How to Squat Like A Powerlifter
Part IV: Bench Form Analysis
Part V: How to Bench Press Like A Powerlifter
Part VI: Deadlift Setup Science
Part VII: Deadlift Form Analysis
Part VIII: How to Deadlift Like a Powerlifter
Do you?
A) Take a breath and get your handoff, THEN take another BIG breath or
B) Take a BIG breath, get your handoff and just go
I used to take a big breath, then lift off and go all on one breath. I’ve changed to taking my big breath after I unrack. Maybe because I unrack myself without a handoff.
Having a handoff or not probably probably makes a difference where you would breath, you think? It appeared from the article that you bench on the same breath you take before handoff, but I would appreciate more clarification here.
Thanks!
Every time you breathe out while under a heavy load, you’re going to get compression of the soft tissue elements and this is going to degrade your position slightly. Generally speaking, you will be unable to fully “undo” this compression even with another big breath. Your set-up will be slightly less tight than it was before. This is why it can be beneficial to do an entire set on one breath if your lung capacity allows for it. However, if you bench in a federation with a start command, sometimes there is really no way around taking two breaths. Overall, having to take two breaths universally results in less tightness, IMO. Of course, doing it one breath is more difficult, uncomfortable, and could possibly be distracting. These things may cause a loss of performance, but the technical nature of the problem allows you to negate any negative consequences with practice.